DFRobot I2C/TWI LCD1602モジュール

DFRobot商品コード:RB-Dfr-69
メーカー #: DFR0063

価格  :
販売価格 ¥2,162

税込

送料はチェックアウト時に計算されます

在庫  :

近日再入荷予定 入荷予定日の照会

この商品の入荷をお知らせします

支払いとセキュリティ

Apple Pay Discover Mastercard PayPal Visa

お客様の決済情報は安全に処理されます。当社はお客様のクレジットカード情報を保存せず、クレジットカード情報にアクセスすることもできません。

概要

  • DFRobot I2C/TWI LCD1602モジュール
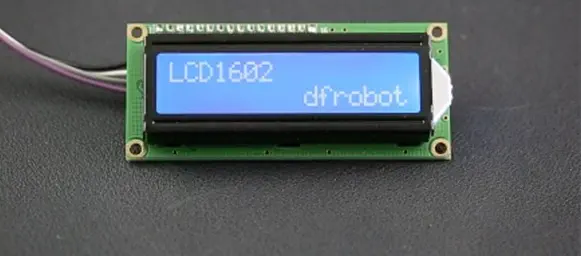
  • 青色バックライト付きの鮮明な16x2 LCDを搭載
  • I2CによりArduinoに簡単に接続可能
  • コントラスト調整により鮮明さの調整が可能
  • I2Cアドレスの設定が可能で競合を防止
  • ブレッドボード対応のXH2.54コネクタを搭載

DFRobot I2C/TWI LCD1602モジュールは、Arduino機器向けに設計した16x2文字のLCDディスプレイです。青色の背景に白色の文字が特徴で、鮮明で見やすい表示を実現します。このモジュールはI2C通信インタフェースを採用しているため、Arduino Unoなど、利用可能な端子数が限られている機器に特に有利です。こインタフェースはVCC、GND、SDA、SCLの4ピンのみで接続できるため、配線が簡素化し、接続の複雑さを軽減します。

このモジュールは標準のXH2.54コネクタを搭載し、ブレッドボードと互換性があり、ジャンパ線で簡単に接続できます。これにより容易に設置でき、機器の設計の柔軟性が向上します。モジュールのI2Cアドレスは0x20~0x27の範囲で設定できるため、超音波センサや加速度センサなどの他のI2Cデバイスとのアドレス競合を回避できます。さらに、ディスプレイのコントラストはポテンショメータで手動で調整できるため、環境条件やユーザの好みに合わせてディスプレイの視認性を最適化できます。

より広い表示スペースが必要な機器には、20x4文字のLCDディスプレイモジュールという代替オプションがあり、より広い表示領域を提供します。このモジュールはより多くの文字を表示できるため、情報表示のためのスペースが広がります。

注意:ディスプレイやコネクタの損傷を防ぐため、モジュールを適切に取り扱ってください。

DFRobot I2C LCD1602 モジュールディスプレイ - 正面図

  • 1 x DFRobot I2C/TWI LCD1602モジュール
  • 1 x I2C 16x2 LCDスクリーン(Arduino互換)
  • 80 x 36 x20mm
  • Arduino/Genuino UNO、Leonardo、Mega、101 (Intel Curie)、Micro、Nano、Miniと互換性あり
  • I2Cアドレス:0x20~0x27 (デフォルト 0x20)
  • バックライト付きディスプレイ(青色に白色の文字)
  • 供給電圧:5V
  • インタフェース:I2C/TWI x1、Gadgeteer インタフェース x2
  • コントラスト調整可能
  • I2Cコネクタ:VCC、GND、SCL、SDA

Customer Reviews

Based on 2 reviews
50%
(1)
50%
(1)
0%
(0)
0%
(0)
0%
(0)
R
Roger
Solid built board, but not well supported (yet)

Had issues locating a library that actually worked, could not get the standard libraries to work but I did eventually locate a library that does work and appears to perform well.

R
Ryan
excellent had not problems

worked with numerous libraries. just need to find the address when using with arduino. use i2c scanner code below for finding the address. // -------------------------------------- // i2c_scanner // // Version 1 // This program (or code that looks like it) // can be found in many places. // For example on the Arduino.cc forum. // The original author is not know. // Version 2, Juni 2012, Using Arduino 1.0.1 // Adapted to be as simple as possible by Arduino.cc user Krodal // Version 3, Feb 26 2013 // V3 by louarnold // Version 4, March 3, 2013, Using Arduino 1.0.3 // by Arduino.cc user Krodal. // Changes by louarnold removed. // Scanning addresses changed from 0...127 to 1...119, // according to the i2c scanner by Nick Gammon // http://www.gammon.com.au/forum/?id=10896 // Version 5, March 28, 2013 // As version 4, but address scans now to 127. // A sensor seems to use address 120. // Version 6, November 27, 2015. // Added waiting for the Leonardo serial communication. // // // This sketch tests the standard 7-bit addresses // Devices with higher bit address might not be seen properly. // #include void setup() { Wire.begin(); Serial.begin(9600); while (!Serial); // Leonardo: wait for serial monitor Serial.println("\nI2C Scanner"); } void loop() { byte error, address; int nDevices; Serial.println("Scanning..."); nDevices = 0; for(address = 1; address < 127; address++ ) { // The i2c_scanner uses the return value of // the Write.endTransmisstion to see if // a device did acknowledge to the address. Wire.beginTransmission(address); error = Wire.endTransmission(); if (error == 0) { Serial.print("I2C device found at address 0x"); if (address<16) Serial.print("0"); Serial.print(address,HEX); Serial.println(" !"); nDevices++; } else if (error==4) { Serial.print("Unknown error at address 0x"); if (address<16) Serial.print("0"); Serial.println(address,HEX); } } if (nDevices == 0) Serial.println("No I2C devices found\n"); else Serial.println("done\n"); delay(5000); // wait 5 seconds for next scan }

送料の見積り

こちらもあなたにおすすめ